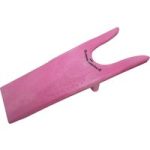
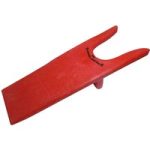
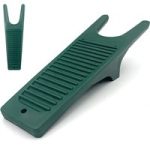
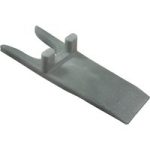
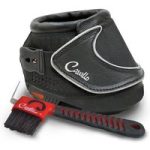
Cavallo Horse Entry Level Hoof Boot – Bling Single – Slim Sole – Size 5
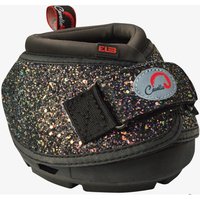
For those still andldquo;nervousandrdquo; about making the shift to becoming andlsquo;barefoot and bootedandrsquo;, and those who are already barefoot but require protection only on limited occasions, the ELB is the perfect solution. The ELB is also ideal for rehabilitation and therapeutic purposes. The ELB is made of 1680 count denier industrial grade nylon andndash; the same material used on Cavalloandrsquo;s Sport hoof boots. The replaceable Velcro closure extends the working life of the boot in the event of Velcro fatigue and is easy to fasten. The ELB is offered on both of Cavalloandrsquo;s soles andndash; the Regular sole, (length and width equal) and the Slim sole (width is andfrac14;andrdquo; or 5mm narrower than length). Both soles incorporate the unique, built in side drainage slots to drain mud, water and sand easily and will not clog up. Sold in singles. Measuring and Fitting your Cavallo Hoof Boots Cavallo Boots are SIMPLE to MEASURE 1 ) Measure the hoof carefully just AFTER A FRESH TRIM. 2) Measure the length from the heel buttress line to the toe. Do NOT include heel bulbs. (Refer to the diagram and video below) 3) Measure right across the widest part of each hoof. 4) Compare your measurements to Cavallo sizing chart below. Stay within the boot size range as room for growth has already been allowed for between regular trims. The Cavallo Regular sole is best for a hoof that is measuring the same length and width. The Slim sole is 1/4 inch (6 mm) narrower than long and better suited to a more oval shaped hoof. 5) Please re-measure if the length is greater than the width by two sizes, 1/2 inch (12mm) or more. Measuring Tips: IMPORTANT: OUR MEASURING TOOL MAY NOT PRINT TO SCALE (which could result in incorrect sizing). Please check measurements against a ruler before proceeding to measure. The weight-bearing LENGTH indicates the size necessary. Take width measurements as well since that helps to confirm you have chosen the correct size You may wish to measure each hoof as they may differ in size requiring two different pairs. Only new UNUSED boots can be exchanged. To keep the boot clean, we suggest covering the hoof with thin plastic and checking fit on a non-scuff (not gravel), clean, dry surface. Cavallo Hoof Boots are SIMPLE to FIT! Simply insert hoof into boot. Secure Velcroandreg; closures and adjust sliding keepers on the Simple boot or secure outside closure on the Sport boot. IMPORTANT NOTES ON FITTING: You should not have to force the boot on the horseandrsquo;s hoof in any way.If you are having to force the boot on it is too small. If the boot is rotating independently from the horseandrsquo;s hoof it is too big. A wiggle is ok because the hoof expands in weight bearing and even further in movement. Remember that there is a break-in period like your own boots would be when you first get them. The first day the boots shouldnandrsquo;t be worn for more than 20 minutes. You wouldnandrsquo;t put on brand new boots and go walking for hours; treat your horseandrsquo;s new boots as you would your own. You can speed up the break-in process by using leather softener or riding through water. Here you can see how the sole fits into the length of the boot and the heel bulbs fit into the padded heel area at the back of the boot. Before Your First Ride Only new UNUSED boots can be exchanged. To keep the boot clean, we suggest covering the hoof with thin plastic and checking fit on a non-scuff (not gravel), clean, dry surface. Like your own riding boots, it is recommended that time is taken to gradually break in your Cavallo Boots. If your horse has sensitive skin, or if you are going on a long ride and are concerned about potential rubbing, Cavallo Pastern Wraps are available. If your horse is fine boned and there is excess space between the pastern and the boot collar, wraps can also prevent major debris from entering the boot. Simple Fitting Tips: SOLE: The sole of the hoof should fit securely inside the boot sole. Ensure that the entire weight-bearing wall from front of toe to heel buttress sits within the Simple Boot outsole. It may be helpful to compare the outside raised tread area at the bottom of the boot to the weight-bearing length of the hoof sole (toe to buttress as per diagram above). OUTER COVER: Ensure that the boot tongue is pushed firmly against the hoof. Draw the outer flaps firmly around the hoof, pressing the Velcro on the flaps against the Velcro on the tongue; keep taut and level. TWISTING: If the boot twists or moves excessively, it may be too big or the outer cover may be loosely fastened. TOO SMALL: If you have difficulty putting the boot on, it may be too small. Ideally the boot andldquo;snapsandrdquo; nicely onto the hoof for a good fit. Please check your measurements against the chart above. PASTERN WRAPSmay be used to assist in the breaking-in process to prevent chafing. ONCE THE BOOT IS FITTED,if the strap extends beyond the nylon keeper, then you can cut the strap to the preferred length, leaving a line of stitching to prevent unraveling. (Only applies to Simple Boot) PLEASE NOTE: Boots cannot be exchanged if straps have been cut. Be sure boots are correct size BEFORE cutting….
![]()
Related Posts:
 Cavallo Horse Entry Level Hoof Boot – Bling Single – Slim Sole – Size 0
Cavallo Horse Entry Level Hoof Boot – Bling Single – Slim Sole – Size 1
Cavallo Horse Entry Level Hoof Boot – Bling Single – Slim Sole – Size 2
Cavallo Horse Entry Level Hoof Boot – Bling Single – Slim Sole – Size 4
Cavallo Horse Entry Level Hoof Boot – Bling Single – Slim Sole – Size 6
Cavallo Horse Entry Level Hoof Boot – Bling Single – Regular Sole – Size 0
Cavallo Horse Entry Level Hoof Boot – Bling Single – Regular Sole – Size 2
Cavallo Horse Entry Level Hoof Boot – Bling Single – Regular Sole – Size 3
Cavallo Horse Entry Level Hoof Boot – Bling Single – Regular Sole – Size 6
Cavallo Horse Entry Level Hoof Boot – Bling Single – Slim Sole – Size 0
Cavallo Horse Entry Level Hoof Boot – Bling Single – Slim Sole – Size 1
Cavallo Horse Entry Level Hoof Boot – Bling Single – Slim Sole – Size 2
Cavallo Horse Entry Level Hoof Boot – Bling Single – Slim Sole – Size 4
Cavallo Horse Entry Level Hoof Boot – Bling Single – Slim Sole – Size 6
Cavallo Horse Entry Level Hoof Boot – Bling Single – Regular Sole – Size 0
Cavallo Horse Entry Level Hoof Boot – Bling Single – Regular Sole – Size 2
Cavallo Horse Entry Level Hoof Boot – Bling Single – Regular Sole – Size 3
Cavallo Horse Entry Level Hoof Boot – Bling Single – Regular Sole – Size 6
 Cavallo Horse Entry Level Hoof Boot – Black Single – Slim Sole – Size 0
Cavallo Horse Entry Level Hoof Boot – Black Single – Slim Sole – Size 6
Cavallo Horse Entry Level Hoof Boot – Black Single – Slim Sole – Size 1
Cavallo Horse Entry Level Hoof Boot – Black Single – Slim Sole – Size 0
Cavallo Horse Entry Level Hoof Boot – Black Single – Slim Sole – Size 6
Cavallo Horse Entry Level Hoof Boot – Black Single – Slim Sole – Size 1
 Cavallo Horse Entry Level Hoof Boot – Black Single – Regular Sole – Size 0
Cavallo Horse Entry Level Hoof Boot – Black Single – Regular Sole – Size 1
Cavallo Horse Entry Level Hoof Boot – Black Single – Regular Sole – Size 2
Cavallo Horse Entry Level Hoof Boot – Black Single – Regular Sole – Size 3
Cavallo Horse Entry Level Hoof Boot – Black Single – Regular Sole – Size 0
Cavallo Horse Entry Level Hoof Boot – Black Single – Regular Sole – Size 1
Cavallo Horse Entry Level Hoof Boot – Black Single – Regular Sole – Size 2
Cavallo Horse Entry Level Hoof Boot – Black Single – Regular Sole – Size 3
 Cavallo Horse Entry Level Hoof Boot – Replacement Closure
 Cavallo Cute Little Boot Horse Hoof Boots – Bling – Slim Sole – Size M1 – Single
 Cavallo Horse Simple Hoof Boot – Black Pair – Slim Sole – Size 0
Cavallo Horse Simple Hoof Boot – Black Pair – Slim Sole – Size 6
Cavallo Horse Simple Hoof Boot – Black Pair – Slim Sole – Size 1
Cavallo Horse Simple Hoof Boot – Black Pair – Slim Sole – Size 2
Cavallo Horse Simple Hoof Boot – Black Pair – Slim Sole – Size 0
Cavallo Horse Simple Hoof Boot – Black Pair – Slim Sole – Size 6
Cavallo Horse Simple Hoof Boot – Black Pair – Slim Sole – Size 1
Cavallo Horse Simple Hoof Boot – Black Pair – Slim Sole – Size 2
 Cavallo Cute Little Boot Horse Hoof Boots – Bling – Slim Sole – Size M2
Cavallo Cute Little Boot Horse Hoof Boots – Bling – Slim Sole – Size M4
Cavallo Cute Little Boot Horse Hoof Boots – Bling – Slim Sole – Size M3
Cavallo Cute Little Boot Horse Hoof Boots – Bling – Slim Sole – Size M2
Cavallo Cute Little Boot Horse Hoof Boots – Bling – Slim Sole – Size M4
Cavallo Cute Little Boot Horse Hoof Boots – Bling – Slim Sole – Size M3
 Cavallo Horse Sport Hoof Boot – Black Slim Pair – Size 0
Cavallo Horse Sport Hoof Boot – Black Slim Pair – Size 1
Cavallo Horse Sport Hoof Boot – Black Slim Pair – Size 2
Cavallo Horse Sport Hoof Boot – Black Slim Pair – Size 5
Cavallo Horse Sport Hoof Boot – Black Slim Pair – Size 4
Cavallo Horse Simple Hoof Boot – Black Pair – Regular Sole – Size 0
Cavallo Horse Sport Hoof Boot – Black Slim Pair – Size 0
Cavallo Horse Sport Hoof Boot – Black Slim Pair – Size 1
Cavallo Horse Sport Hoof Boot – Black Slim Pair – Size 2
Cavallo Horse Sport Hoof Boot – Black Slim Pair – Size 5
Cavallo Horse Sport Hoof Boot – Black Slim Pair – Size 4
Cavallo Horse Simple Hoof Boot – Black Pair – Regular Sole – Size 0
 Cavallo Horse Simple Hoof Boot – Black Pair – Regular Sole – Size 2
Cavallo Horse Simple Hoof Boot – Black Pair – Regular Sole – Size 3
Cavallo Horse Simple Hoof Boot – Black Pair – Regular Sole – Size 6
Cavallo Horse Simple Hoof Boot – Black Pair – Regular Sole – Size 5
Cavallo Horse Simple Hoof Boot – Black Pair – Regular Sole – Size 2
Cavallo Horse Simple Hoof Boot – Black Pair – Regular Sole – Size 3
Cavallo Horse Simple Hoof Boot – Black Pair – Regular Sole – Size 6
Cavallo Horse Simple Hoof Boot – Black Pair – Regular Sole – Size 5
 Cavallo Cute Little Boot Horse Hoof Boots – Bling – Regular Sole – Size M1
 Cavallo Cute Little Boot Horse Hoof Boots – Bling – Regular Sole – Size M2
 Cavallo Cute Little Boot Horse Hoof Boots – Bling – Regular Sole – Size M3
 Cavallo Cute Little Boot Horse Hoof Boots – Bling – Regular Sole – Size M4
 Cavallo Cute Little Boot Horse Hoof Boots – Black – Slim Sole – Size M3